In this posting, we will learn about the loop in Vue.
Create a Project
2021.06.02 - [Web/JavaScript] - [Vue] Getting Started with Vue3 + TypeScript + TailwindCSS
Let's create a project first refer to the above post.
Multiplication Table Example
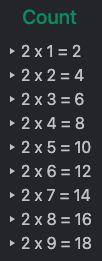
<h2 class="mb-2 text-xl font-medium text-green-600">Count</h2>
<ul>
  <li v-for="num in 9" :key="num">⯈ 2 x {{ num }} = {{ 2 * num }}</li>
</ul>
In Vue, all the loops can be handled by v-for.
The basic loop is using a numeric loop.
You just set the maximum number of loop counts.
And, all tags in the loop have a unique key. That is the :key portion.
Focus on this point!
v-for="num in 9"
num is from 1 to 9!!!
Loop with Array
Now, let's figure out the looping with an array.
<h2 class="mt-8 mb-2 text-xl font-medium text-green-600">Array</h2>
<ul>
  <li v-for="elem in fruits" :key="elem">⯈ {{ elem }}</li>
</ul>
data: function () {
return {
fruits: ["apple", "banana", "cherry"],
};
},
You should just change the number to an array.
You can also simply get the index.
<ul>
  <li v-for="(elem, index) in fruits" :key="elem">
    ⯈ {{ index }}: {{ elem }}
  </li>
</ul>
Focus on the differences.

Now, let's modify the array dynamically.
Add this code for it.
<div class="mt-2 flex">
  <button @click="change(0, 'orange')" class="btn mr-4">Change</button>
  <button @click="push('mango')" class="btn mr-4">Push</button>
  <button @click="add(2, 'grape')" class="btn mr-4">Add</button>
  <button @click="remove(3)" class="btn">Remove</button>
</div>
methods: {
change: function (position: number, fruit: string) {
this.fruits[position] = fruit;
},
push: function (fruit: string) {
this.fruits.push(fruit);
},
add: function (position: number, fruit: string) {
this.fruits.splice(position, 0, fruit);
},
remove: function (position: number) {
this.fruits.splice(position, 1);
},
},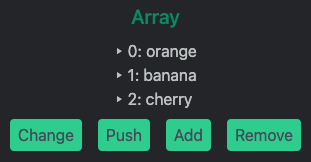
change(0, 'orange') => fruits[0] = 'orange'
If you click the change button, the 0th index of the array will be changed to orange.

push('mango') => fruits.push('mango')
If you click the push button, mango will add to the last element of the array.
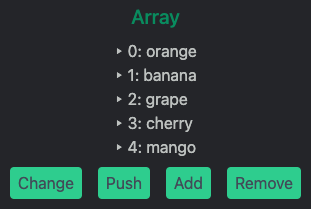
add(2, 'grape') => fruits.splice(2, 0, 'grape)
If you click the add button, grape will be added in the 2nd index.
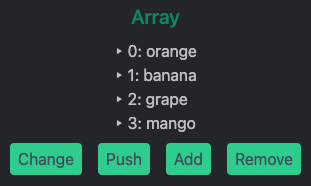
remove(3) => fruits.splice(3. 1)
If you click the remove button, the 3rd index element of the array will be removed.
※ All you have to concentrate on in this example is that whenever there is an array change, Vue automatically renders it.
Loop with Object
Object cases are similar to array cases.
<h2 class="mt-8 mb-2 text-xl font-medium text-green-600">Object</h2>
<ul>
  <li v-for="item in scores" :key="item">
    ⯈ {{ item.name }}: {{ item.score }}
  </li>
</ul>
data: function () {
return {
scores: [
{ name: "kim", score: 97 },
{ name: "lee", score: 76 },
{ name: "park", score: 88 },
],
};
},You can access an object's key via dot(.) to get its value.

Combination with v-if
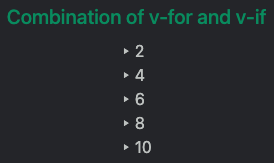
<h2 class="mt-8 mb-2 text-xl font-medium text-green-600">
  Combination of v-for and v-if
</h2>
<ul>
  <template v-for="num in 10">
    <li :key="num" v-if="num % 2 === 0">⯈ {{ num }}</li>
  </template>
</ul>
Please refer to the code. ES lint recommends this way to use both v-for and v-if.
This example only shows an even number.
'Web > JavaScript' 카테고리의 다른 글
| [Vue3] Lifecycle (0) | 2021.06.16 |
|---|---|
| [Vue3] Computed Property and Watcher (0) | 2021.06.12 |
| [Vue3] Conditional Processing using v-if (1) | 2021.06.08 |
| [Vue3] Handling Event using v-on (0) | 2021.06.06 |
| [Vue3] Interacting with User Input using v-model (0) | 2021.06.06 |


댓글