Web 개발 등에 익숙하다면 UI를 구성할 때, 컴포넌트 별로 재사용성 등을 위해 별도의 파일로 구분하여 관리하는 것을 아실 거에요.
PyQt를 사용할 때도 UI 코드가 비대해지면 관리가 어렵기도하고, 재사용성도 떨어지다보니 개인적으로 특정 기준으로 파일을 분리해서 사용하고 있습니다.
QML에서도 간단하게 이런 방식을 사용할 수 있어 소개해 드리려고 합니다.
기본 Application 작성에 대해서는 이전 포스팅을 참고해주세요.
2022.11.03 - [Python] - [PyQt6] Getting Started with QtQuick
QML File in QML File
// main.qml

import QtQuick
import QtQuick.Layouts
import QtQuick.Controls
import QtQuick.Controls.Material

ApplicationWindow {
  visible: true
  width: 640
  height: 480
  title: "Example App"

  Material.theme: Material.Dark
  Material.accent: Material.Orange
  Material.primary: Material.Orange

  property string msg: "Label 2"

  GridLayout {
    anchors.centerIn: parent
    columns: 1

    MyLabel {}
    MyButton {
      Layout.alignment: Qt.AlignHCenter
    }
  }
}MyLabel과 MyButton이 별도로 분리한 컴포넌트 파일입니다.
이렇게 파일명을 직접 작성하는 방법으로 간단하게 사용하실 수 있습니다.
다만, 이렇게 파일을 분리할 경우 서로 데이터를 주고받기 어려워지므로 msg라는 property를 하나 두어 사용하였습니다.
여러 가지 방법이 있지만 이 방법이 일단 가장 간단하게 사용할 수 있어 이 방식을 적용했습니다.
// MyLabel.qml

import QtQuick
import QtQuick.Layouts
import QtQuick.Controls
import QtQuick.Controls.Material

RowLayout {
  spacing: 40

  Label {
    text: "Label 1"
    font.pixelSize: 36
  }

  Label {
    text: msg
    font.pixelSize: 36
  }

  Label {
    text: "Label 3"
    font.pixelSize: 36
  }
}
예제로 Label을 3개 두고, 2번째 Label은 msg property의 값을 사용하도록 했습니다.
// MyButton.qml

import QtQuick
import QtQuick.Controls
import QtQuick.Controls.Material

Button {
  text: "Change"
  onClicked: msg = "Changed"
}
여기서는 Button을 1개 두고 click 시 msg property의 값을 변경하도록 했습니다.
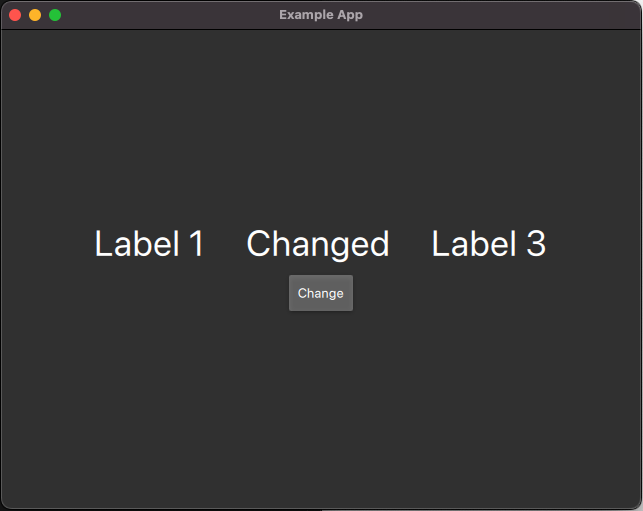
잘 동작하는 것을 보실 수 있습니다.
만약 다른 folder에 있는 QML 파일을 불러오고 싶다면 간단하게 해당 folder만 import 해주시면 되요.
import './components'imported되는 QML file은 Layout 계열, Row, Column 등의 Item type 등으로 묶이거나 단일 Control type으로 구성될 경우 정상 동작했습니다.
Component의 경우 동작하지 않으며, Item의 경우 alignment를 별도로 맞춰야 했고, Container의 경우 동작은 하지만 제대로 보이지 않았습니다.
Using Loader
위의 예제를 Loader를 사용하여 변경하겠습니다.
import QtQuick
import QtQuick.Layouts
import QtQuick.Controls
import QtQuick.Controls.Material

ApplicationWindow {
  visible: true
  width: 640
  height: 480
  title: "Example App"

  Material.theme: Material.Dark
  Material.accent: Material.Orange
  Material.primary: Material.Orange

  property string msg: "Label 2"

  ColumnLayout {
    anchors.centerIn: parent

    Loader {
      source: 'MyLabel.qml'
    }

    Loader {
      Layout.alignment: Qt.AlignHCenter
      source: 'MyButton.qml'
    }
  }
}Loader를 사용할 경우, 보시는대로 source property를 사용하여 QML file의 path를 적어줄 수 있습니다.
따라서, run-time에 동적으로 변경을 할 수 있고, 따로 import하지 않아도 다른 폴더에 있는 파일을 불러올 수도 있습니다.
동작은 모두 동일하니 필요에 따라 적용하시면 됩니다.
Wrap Up
이제 우리는 컴포넌트를 별도의 파일로 구성하여 재사용성 및 유지보수성을 모두 높일 수 있으며, 런타임에 동적으로 화면을 변경할 수 있게 되었습니다.
이번 포스팅도 유익했으면 좋겠습니다.
'Python' 카테고리의 다른 글
| [PyQt6] User Input in QML (0) | 2022.11.19 |
|---|---|
| [PyQt6] Drawer in QML (0) | 2022.11.18 |
| [PyQt6] Menu in QML (0) | 2022.11.10 |
| [PyQt6] QML에서 Tool Bar 만들기 (0) | 2022.11.06 |
| [PyQt6] Action in QML (0) | 2022.11.06 |


댓글